FAST for SharePoint 2010 allows us to integrate our own custom processor into the search engine’s processing pipeline. While attempting to modify the default processing pipeline may sound like an hazardous task, its actually not that bad. In part 1 of the series we will set the stage for our custom processor by creating a BCS connector, set the managed properties and add a refiner to the refinement panel.
For the purpose of this article, we’ll use BCS as a connector for a database with the following columns:
There is nothing special about the ProductID, ProductName or ProductDescription columns. These are just your regular run of the mill nvarchar and int columns. ProductTags on the other hand is a bit different.
ProductTags is going to represent a set of tags, separated by the | (pipeline) character. Once crawled, this property will serve as a refinement property. The problem with this column is that we need to separate the tags using the pipeline character so each tag will be counted as an individual tag. If our search result return 3 products with the tag Home Styling, the user expects that the refinement panel will show Home Styling (3).
So how do we get this result? how do we separate the tags? The short answer would be integrating a custom pipeline processor that will receive the tags as input, and replace the pipeline separator character with a character FAST recognize as a separator – the char u2029.
Before we go on with creating the custom processor make sure you have some products in your data base. Pay special attention to the ProductTags column and make sure you add data to it with the following format: tag|tag|tag etc.
To get the data from the SQL database to our SharePoint we are going to use a BCS connector built in SharePoint Designer 2010. Using SharePoint Designer 2010 to create BCS connections is a fast and simple method to create BCS connections and its great to use when the data you wish to represent is simple, as in our case.
Creating the BCS connection
To keep this post focused on the subject of item processing, follow the great walkthrough by Ingo Karstein – Create a simple BCS connection with SharePoint Designer 2010
Once you have the BCS created we can go ahead and create our crawling content source.
Creating a crawl content source
Fire up SharePoint 2010 central admin and choose Manage service applications. Choose your FAST content SSA and click Content Sources on the left side menu. We are now in the Manage Content Sources page.
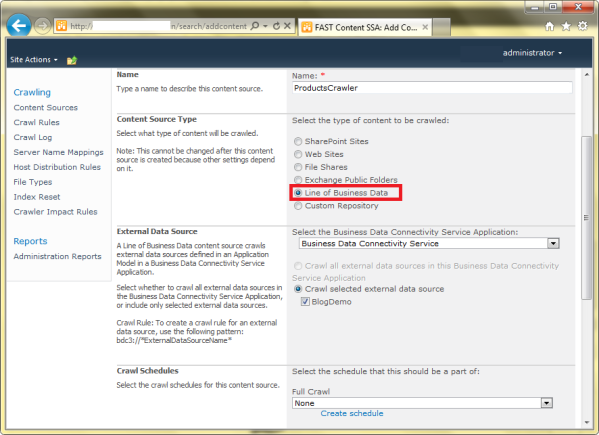
Click on the New Content Source button on the upper horizontal bar to add a new content source to crawl. The Add Content Source page shows up. Name the new content source to your liking. At the Content Source Type area, make sure you select Line of Business Data and select the name of the BCS connector you created earlier.
In my system the form looks as follows:
Once all the fields are filled, scroll to the bottom of the page, check the Start full crawl of this content source box and click the OK button. Wait for the crawler to finish its thing and check the crawl log by clicking on Crawl Log on the left menu.If your content source shows successes or warnings you are clear to move on to the next step.
Mapping managed properties
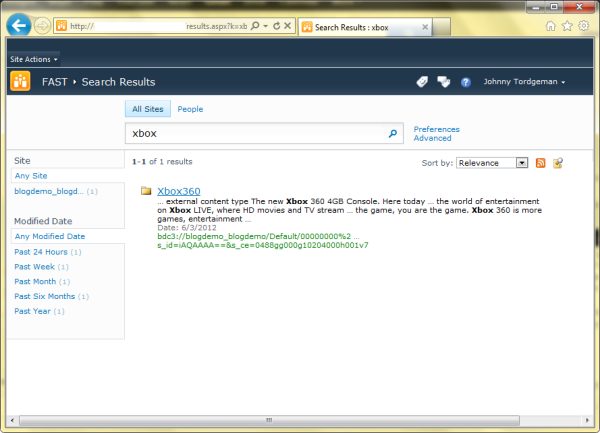
If we try to perform a search right now we will see that the title of the result items is wrong. For example, if we search for the term Xbox, which i have in my database as a product name, we will get the following result:
Not the most informative title is it… In order to show the right title, we have to set the managed property Title to include data from the crawled property that represent ProductName from our database. This process is called mapping. We map a managed property to include data from crawled property.
Fire up the ol’ central admin and click on Manage service applications. Click on your FAST Query SSA application and then click on FAST Search Administration on the top part of the left menu. Under Property Management, click on Managed properties:
In the Managed properties page, search for the managed property Title. Once found, click on it and choose Edit Managed Property. At the Mappings to Crawled Properties section of the page click on the Add Mapping button. Change the category to Business Data, find the ProductName crawled property, mark it and click on Add. The name of the crawled property might differ a bit in your setup with an additional prefix such as read listelement or something similar.
Once added click on the OK button. Again under the Mappings to Crawled Properties section highlight the newly added property and using the Move Up button move it all the way to the top. That will make sure that FAST will use the data from this property.
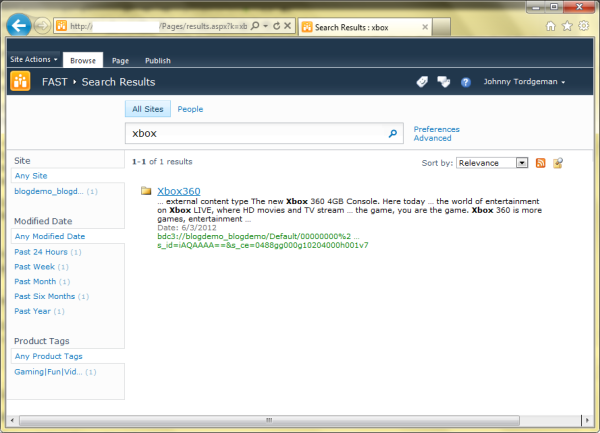
Finally, click on the OK button and perform a full crawl again on our content source. If we perform the same search for Xbox now, the result will be as follows:
Now that we got this issue out of the way, let’s add the ProductTags property to the refinement panel.
Adding a refinement property
Before we can add our tags property to the refinement panel we first have to create, well a property for it. Once again, fire up the central admin, click on Manage service applications, then click on your FAST Query SSA application and finally click on FAST Search Administration on the top part of the left menu.
Under Property Management, click on Managed properties and then click on Add Managed Property. Name the new property as you wish. In my example i called it ProductTags.
Next, under the Mappings to Crawled Properties section make sure the first radio button is selected and click on Add Mapping. Once again, change the category to Business Data and look for an entity with the name ProductTags. Add it and click OK.
Under the Refiner Property section check both Refiner property and Deep Refiner.
Under the Query Property section check the Query property check box and click OK.
For FAST to recognize our new property we must perform a crawl again, so go ahead and perform another full crawl on our content source. Once done get back to the search result page and under Site Settings click on Edit Page.
Click on Edit Web Part for the Refinement Panel web part and expend the Refinement section. Copy the xml from the Filter Category Definition property to your favorite text editor and add the following snippet above the closing FilterCategories tag (the last line):
<Category Title=“Product Tags” Description=“Tags for product” Type=“Microsoft.Office.Server.Search.WebControls.ManagedPropertyFilterGenerator” MetadataThreshold=“1”
NumberOfFiltersToDisplay=“4” MaxNumberOfFilters=“20” ShowMoreLink=“True” MappedProperty=“ProductTags” MoreLinkText=“show more” LessLinkText=“show fewer” ShowCounts=“Count“ />
Copy the XML back to the Filter Category Definition property and make sure you uncheck the Use Default Configuration check box!
Once done click OK and Save & Close to finish editing the page. The result of the change is as follows:
Well we are half way trough.. we have the tags showing in the refinement panel but they aren’t separated. All the tags are shown in the same line. As stated above, the reason for this is that FAST doesn’t recognize the pipeline char as a separator and as such treat the text as one big line.
To solve this issue we will need to build a custom processor to replace the pipeline char with FAST’s separator char. We will build this processor in part 2 of the series, so take a short rest (you deserve it after all these settings) and check back soon for part 2 🙂


